Tip: To install theme and know about basic needs of valise please use “Quick Install Like Demo” documentation file.
It's 8 Easy steps to install valise theme looks like a demo within 5 min.
Video Guide Documentation (Quick Install) Change Log (Updates)
As you can see below image 3 header selections.

Title
If you select title in header section. That shows you a nice look of page title and breadcrumbs
Tip: You can also able to set a background image and that options on Appearance -> Theme Options -> Background Options -> Title Background Area
No Title
This not show anything on under navigation section.
Revolution Slider
This allows you to add a revolution slider on page header section.
Tip: If you select this slider header then you need to put slider alias that you have created in revolution slider section on under page editor you can see Revolution Slider metabox. See below image :

Note: Valise theme have a four types of post formates Standard, Image, Video, Gallery
How it works?
Note : Standard and Image post formates must need featured image.
- Standard posts type is same as a normal posts.
- Image posts type is based on featured image.
- Video posts type is based on Video Options (you can find it on under post editor section it's called Video Options). It have YouTube, Vimeo, Dailymotion and Self-Host.
- Gallery posts type is based on uploaded images group, when you upload image on featured images section just select number of images that you need to display as a gallery view.
Page Options
Page Option section is under on post editor section. There you can find following things :
- Page Title You can able set custom page title, so it will be display on title area.
- Page Background It will works only on Boxed Layout you can set it on : Appearance > Theme Options > General > Layout.
Tip: Valise theme offers 15 page tempaltes, you can learn more about this below.
As you can see below image we provide 15 page templates(Including Default Template) to user can easily work with our theme.
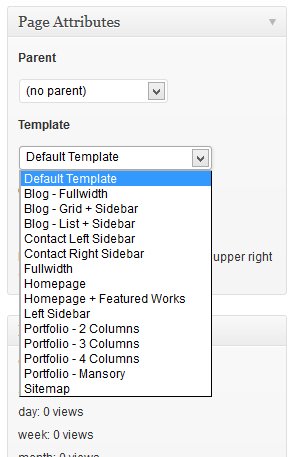
- Default Template set-up with right sidebar and left of content.
- Blog - Full Width show you a full width of news page without sidebar.
- Blog - Grid + Sidebar show you a news in grids with sidebar.
- Blog - List + Sidebar show you a news in lists with sidebar.
- Contact - Left Sidebar show you a contact page with left sidebar.
- Contact - Right Sidebar show you a contact page with right sidebar.
- Fullwidth show you a contents in Fullwidth.
- Homepage if you select Homepage template you need to edit all things on Appearance -> Theme Options -> Home Page
- Homepage + Featured Works this also same as Homepage template but additionally added Mansory view of your portfolio items.
- Left Sidebar this template to show your content on right side with left sidebar.
- Portfolio 2 Columns this template to show your portfolio items in two columns.
- Portfolio 3 Columns this template to show your portfolio items in three columns.
- Portfolio 4 Columns this template to show your portfolio items in four columns.
- Portfolio Mansory this template to show your portfolio items in mansory view.
- Sitemap this template to show your pages lists, post categories and archives.
Header Element Options
You can learn more about this thing on Custom Header Section in this documentation.
Page Options
Page Option section is under on post editor section. There you can find following things :
- Page Title You can able set custom page title, so it will be display on title area.
- Page Background It will works only on Boxed Layout you can set it on : Appearance > Theme Options > General > Layout.
Tip: You can edit other things about portfolio page on : Apperance > Theme Options > Portfolio Page.
Header Element Options
You can learn more about this thing on Custom Header Section in this documentation.
Item Information
- Project Short Title : You can set portfolio short title it'll display under on main title. Eg: Portfolio List Page
- Thumbnail Size : In this option you can select 4 type of image sizes which is :
- Large
- Medium
- Verticle
- Horizontal
Note : It's only apply on when you select Portfolio Mansory page template. Eg : Portfolio Page
- Page Style : It have Style One and Style Two. Eg : Style One and Style Two
- Launch Date : This will display on portfolio single page.
- Developed By Using : This will display on portfolio single page.
- Project Link : This will display on portfolio single page as a button.
- Launch Project Button Text : This will display on portfolio single page as a button.
Tip: You can edit other things about service items on : Apperance > Theme Options > Home Page > Services Section.
Services Options
- Services Button Text : You can edit services button text here (Default : Read More).
- Services Button Link : If you need services Read More button you need to set button link here. If not provied then it will not show.
- Services Icon : Select your service icon from here. Copy that selected icon class then paste in this box. (Eg: icon-heart)
Services Shortcode : [services icon_class="icon-heart" heading="Love Theme" button_text="Read More" button_link="#" hide_button="show"]Add your services text[/services]
Tip: You can edit other things about testimonial items on : Apperance > Theme Options > Home Page > Testimonials Section.
Testimonials Options
- Client Image : You can upload client image on here (Recommended Size : 130x130).
- Company Name : You can set client company name in this box.
Testimonial Shortcode : [testimonial author="Harrison Ford"]Add your content here[/testimonial]
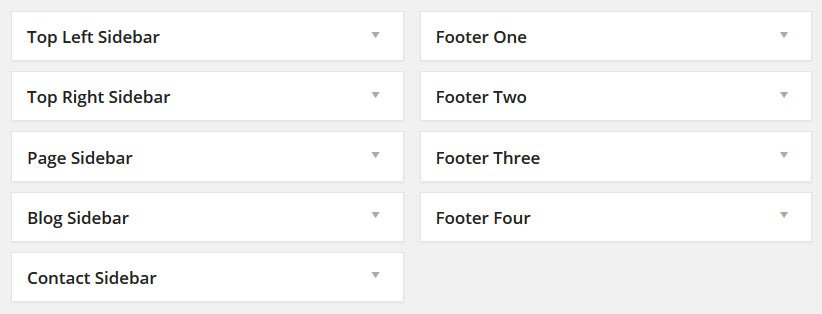
Included with the Valise theme are 9 widget locations, 4 for the footer area and 5 for the sidebar area on all pages, posts, blogs, contact apart from the full-with page.
The widget areas can be accessed by visiting Appearance > Widgets.
This is what the widgets area looks like.
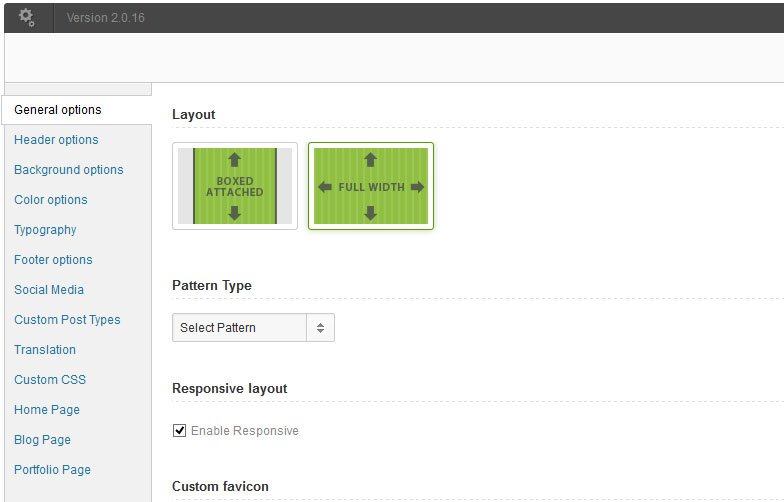
Tip: Please go through about Theme Options, because we added lots of options to users can easily work with this theme and easy understand.
Here is what frontend Theme Options looks like:
IMPORTANT: Revolution slider is a premium slider, so you don't have rights to use this slider apart from this theme.
You can find Revolution slider source files on this theme package. To know more about revolution slider installation and import slider from demo site here.
When you install revolution slider, then you can able to see Under settings.
You can learn more about revolution slider is on Revolusion Slider folder > documentation in this theme package.
The following screenshot is the button of shortcode builder. This will be on all page editor, so you can easily add all type of shortcodes with a one click!
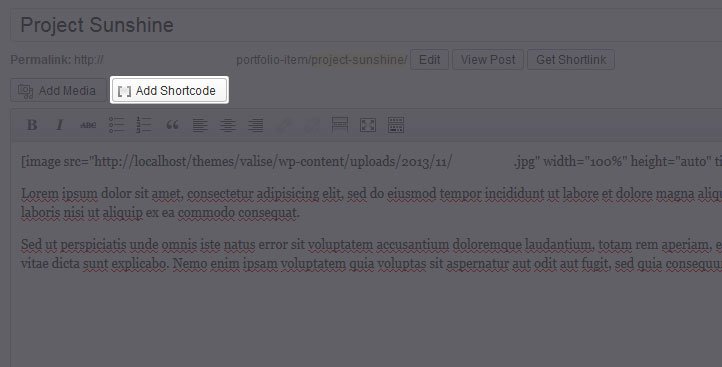
Click "Add Shortcode" button then you can see, bunch of shortcodes with lots of options for each one.
Setting up pages with shortcodes.
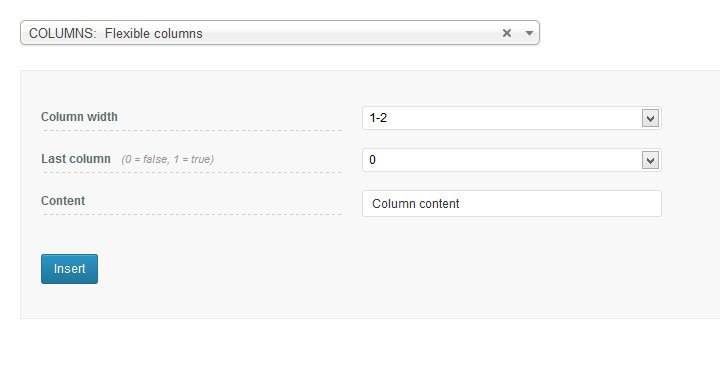
Dropdown and select which one you want then you can customize that shortcodes option then hit "Insert" That's All!
Tip: In this section you can find you basic questions.
How to upload my logo?
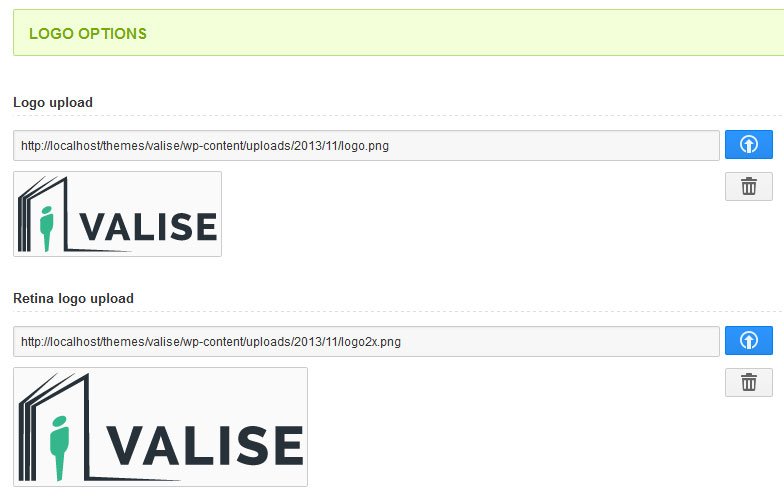
Tip: This theme is Retina ready which shows your site on apple devices with HQ quality. On logo options you need to upload normal logo size and 2x size from normal logo both are in different section so no worry about that.
To add your own custom logo go to Appearance > Theme Options > Header Options Upload your custom logo and Click "Send to OptionTree".
We recommend the size of the logo be as follows – Width is 200 pixels. Height is 80 pixels (normal logo size).
How to translate the theme?
To translate the theme do the following:
- Download the Poedit program to start translating the theme. While there are other programs that you can use, for the sake of clarity and simplicity for this tutorial we will use Poedit. It’s free and you can download it from here. Then install it. That’s easy too. Just click next. Then … next. Then finish. And you’re done.
- Translate the .pot or .mo file that is included in the themes “languages” folder and upload to your theme folder inside of the languages folder. When you save the files, you must name them according to your language code. i.e. for English is en_EN.
- Tell WordPress what language to use. if you haven’t done so already, you’ll need to make sure your wp-config.php file matches your language files. For example, if you’re using a French translation, you’ll need to add the fr_FR.po and fr_FR.mo files to your theme folder, then set your language in wp-config.php, like this: define
(‘WPLANG’, ‘fr_FR’); - Save your wp-config.php file, upload it to your WordPress installation, and you are ready to go. By the way, your wp-config.php file is located in the main directory where all your core WordPress files are located.
If you not getting details from the above instructions, We recommend you to follow this video guides steps Wordpress Theme Language Translation - Guide Which is more effective way to translate themes using CodeStyling Localization plugin.
More information regarding translating themes can be found here: http://codex.wordpress.org/Translating_WordPress
How to create a child theme?
Tip: Valise is also attached child theme, which is on package folder valise-child.zip. Using a child theme will save you lots of time in the future for when theme updates are released, you won’t lose your customizations.
To install a child theme do the following:
- In this theme package we attached valise-child.zip file.
- Install this child theme same as main theme installed steps.
Custom Made Child Theme
To create a child theme do the following:
- Go to /wp-content/themes. Create a new folder and name it the name of your child theme.
- Create a file and name it style.css. In the file include the following information:
/* Theme Name: Name of child Theme Here Description: Child theme for Valise Author: VictorThemes Template: Valise */ @import url("../valise/style.css"); - Activate the theme.
- Add any additional CSS changes to this file, instead of changing the main theme.
Note : You must use same name of the theme folder of template sections (Template: Valise)
More information regarding child themes can be found here: http://codex.wordpress.org/Child_Themes
The uploaded file exceeds the upload_max_filesize directive in php.ini
The default upload file size for WordPress is 2 MB, which is a problem if you want to upload a large media files. If you get this error, “The uploaded file exceeds the upload_max_filesize directive in php.ini”, follow these steps:
- Locate the php.ini file inside the wp-admin directory (if you can’t find this file ask your server support)
- Find this line in the php.ini file “upload_max_filesize = 2M” and replace it with a higher value (e.g. “upload_max_filesize = 64M”)
- You may also want to increase your max post size. Look for this line in your php.ini file “post_max_size” and increase it as well.
- Save the changes to the file inside your wp-admin directory.
Try to upload again.
If you still have issues, look for this file in your root directory and make the same changes.
A better way (and if you do not want to mess up with code) is to use FTP to install the theme.
Credits :
We would like to thank you all great developers and designers and photographs whose work was used in this theme:
Plugins
- FlexSlider
- SuperFish Dropdown
- Retina
- HTML5 Video Player
- FontAwesome
- MobileMenu
- TouchTouch
- BAW Post Views Count
- Contact Form 7
- Easy Fancybox
- Revolution Slider
Images
Icons
- FontAwesome
Don't Forget to Rate this Theme :)
